Once you have created an email account in C-Panel or Direct Admin, you will need to create a corresponding account in your mail program. Although this tutorial is written specifically for Macintosh Mail, you will find that the procedure is very similar for other versions of Outlook, Outlook Express or even other mail clients such as Thunderbird or Eudora. Just be aware that some of the labels and buttons might be different.
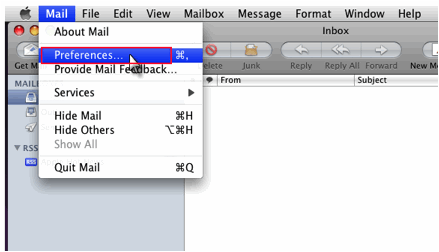
Step 1: Open Mail, click Mail in the top menu, then click Preferences.
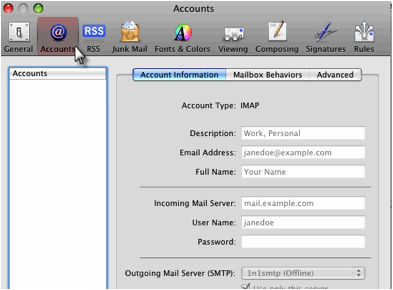
Step 2: Click on “Accounts” button
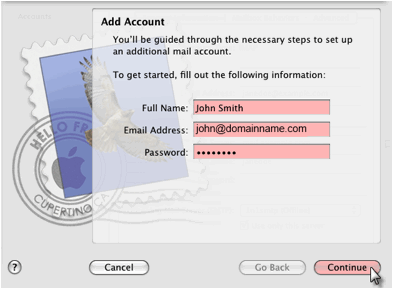
Step 3: Enter your “Full Name”, “Email Address” and “Password and then click the Continue button.
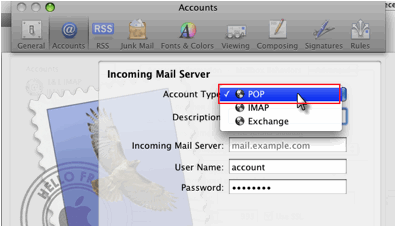
Step 5: Select POP3
- Incoming mail server: Enter mail.Your Domain.com for example; The AU Digital mail server is mail.onlinefusion.com.au. (Note: if in doubt you can actually use the AU Digital mail server, and it will work.)Your name: Enter your name, This is what most email users will see in the inboxes instead of your email address.
- E-mail Address: Enter your full email address. This made up of the mailbox name you chose, e.g: youname@yourdomain.com.
Click the Continue button when finished.
- Description: Description about Email address
- Incoming mail server: Enter mail.Your Domain.com for example; The AU Digital mail server is mail.audigital.com.au. (Note: if in doubt you can actually use the AU Digital mail server, and it will work.)Your name: Enter your name, This is what most email users will see in the inboxes instead of your email address.User Name: Your username will be your entire email address. (Please be sure to use the whole address as if you were sending an email to yourself)
- Password: Enter the password you set up when you created the mailbox within your control panel.
- Remember password: Check this box.

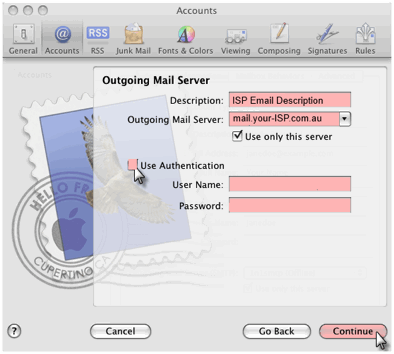
Step 6: Enter Outgoing Mail Settings and then click the Continue button
- Select “Log on using”:
- Dont enter a username and password
- Click on OK.OR
2. Use same setting as incoming mail.
- Select same setting as my incoming mail server check box.
- Click on OK.
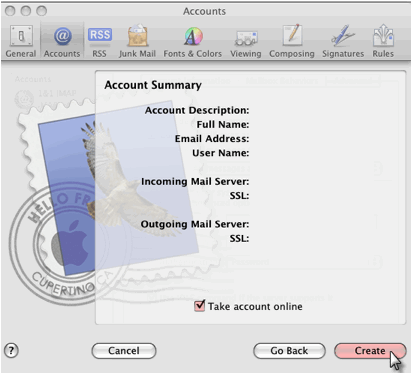
Step 9: Click the Create button
1. ISP smtp infomation
The easiest way to find your outgoing mail server is to contact your ISP.
Some common ISP Outgoing Mail Servers are as follows – typically your username for these servers is your email account (i.e. yourname@isp.com) and associated password:
- BigPond: mail.bigpond.com
- Optus: mail.optusnet.com.au
- iiNet: mail.iinet.net.au – or – mail.m.iinet.net.au
- Westnet: mail.westnet.com.au
- TPG: mail.tpg.com.au
- Ozemail:smtp.ozemail.com.au
*We provide this list as a service to our customers but cannot guarantee that this list will always be up to date.
2. To save allocated hosting account bandwidth limit use your ISPs SMTP
3. Comparing POP and IMAP
POP
- Best when you will be primarily accessing your email from a single location, like your office or home. When you leave your office or home, you can still access your email from a web browser.
- Messages are downloaded to your computer, so you don’t need to worry about exceeding the size of your mailbox.
- When accessing your email account through a web browser, you may not see previous messages that were downloaded to your desktop email client.
IMAP
- Best when you will be accessing your email from multiple locations.
- Allows you to create portable folders. These folders will appear in each email client you use to access your account. Your account will look the same at work, at home, and at your friend’s house.
- Because your email messages are stored on the server, you must monitor your mailbox size and delete messages to avoid exceeding your mailbox size.