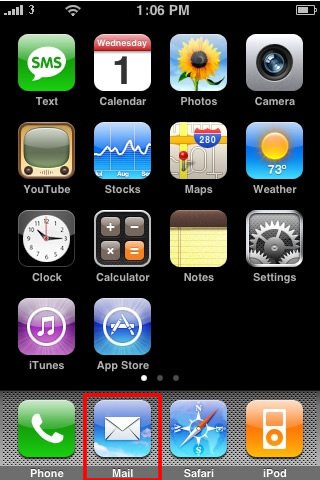
Step 1. From the Dashboard, Tap the Settings icon.
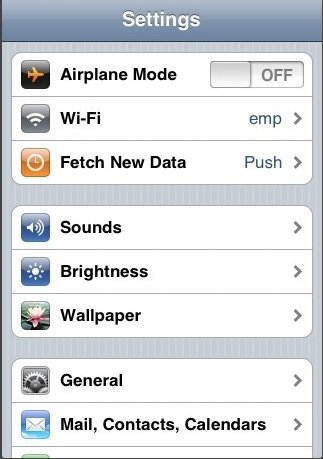
Step 2. Under Settings Tap Mail, Contacts, Calendars.
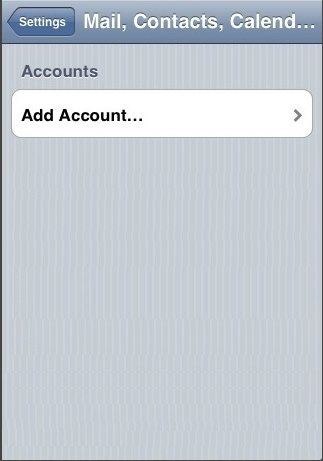
Step 3. Tap Add Account.
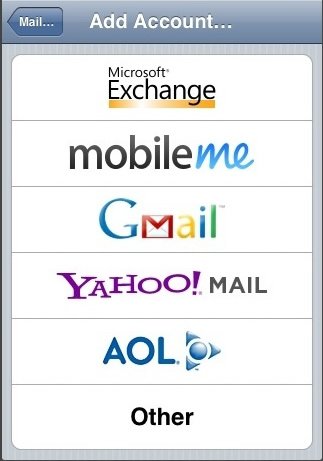
Step 4. Tap Other, located at the bottom of the list.
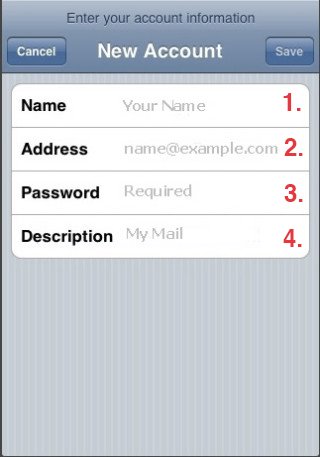
Step 5. Enter the following information in the spaces provided:
- Name—Enter your full first and last name, as you want it to be displayed in the email you send.
- Email—Enter your entire email address (e.g., myname@mydomain.com).
- Password—Enter your email account password. You can change your password either by your Cpanel (www.yourdomainname.com.au/cpanel) or you can contact your host provider.
- Description—Enter a descriptive name for your account (e.g., My Work Account). This description will be visible only to you
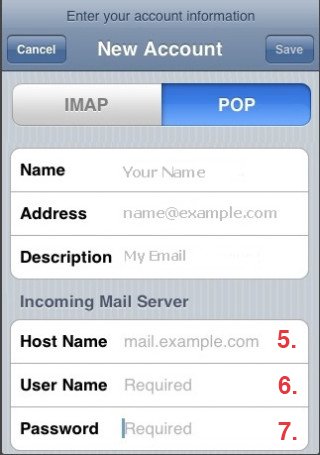
Step 6. On the next screen, select POP on the IMAP / POP button and enter the Incoming Mail Server information:
- Host Name – enter the mail server address (e.g: mail.example.com).
- User Name – enter the full email address (e.g., name@example .com).
- Password – Enter the password associated with your email.
Incoming Mail Server Example:
mail.INSERT-YOUR-DOMAIN-NAME-HERE.com.au
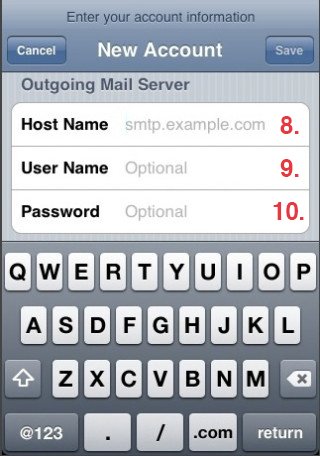
Step 7. Scroll down and enter the Outgoing Mail Server information:
- Host Name – enter the mail server address (e.g: mail.example.com).
- User Name – enter the full email address (e.g., your-name@example .com).
- Password – Enter the password associated with your email.
Outgoing Mail Server
Who is your Internet provider?
| Internet Provider | Outgoing Mail Server |
|---|---|
| AAPT | mail.aapt.net.au |
| iiNet | mail.m.iinet.net.au |
| Internode | mail.internode.on.net |
| iPrimus | smtp.iprimus.com.au |
| OptusNet | mail.optusnet.com.au |
| Telstra Bigpond | mail.bigpond.com |
| TPG | mail.tpg.com.au |
| Vodaphone | smtp.vodafone.net.au |
If your ISP is not here then search online for your ISP outgoing mail address
Step 8. Click Save
Step 9. If you see a message that says “Cannot Connect Using SSL”, click Yes when asked to setup the account without SSL.
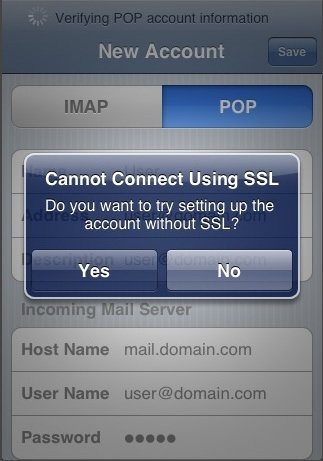
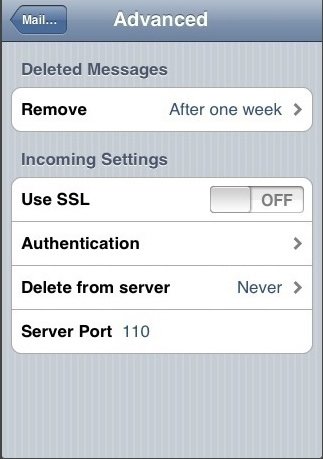
The Advanced settings for the account will be displayed and do not need to be changed.
Step 8. Tap the Save button.
Step 9. You will be returned to the Mail, Contacts, Calendars screen. A POP email connection will normally delete messages from the server after download; however, by default the iPhone will leave copies on the server. This allows you to access these messages through other email clients. To change this setting, tap the name of the account you just created.
Step 10. Scroll to the bottom of the screen, and tap the Advanced button.
Step 11. Tap Delete from server.
Step 12. Tap a selection based on whether messages should be removed from the server: never, after seven days, or when removed from your inbox.
Step 13. After completing these steps, you should be able to send and receive email successfully.